
I often paralyze myself trying to find the perfect solution for something. The right product to achieve X effect. And now that I’ve acquired a 3D printer, and am working on a long term terrain project (more on that later), I’ve happened upon another question that preys on that tendency: How do you prime 3D prints?
There’s a concept called “received wisdom” – common knowledge that is held to be true, but may not be. Things you believe are true because you’re told they’re true, and which you happily assert on Facebook as true. Both miniature wargaming and 3D printing are absolutely swimming in received wisdom, and the intersection of the two is…well…yikes.
Let’s see if we can answer this one with science.
The Test Model
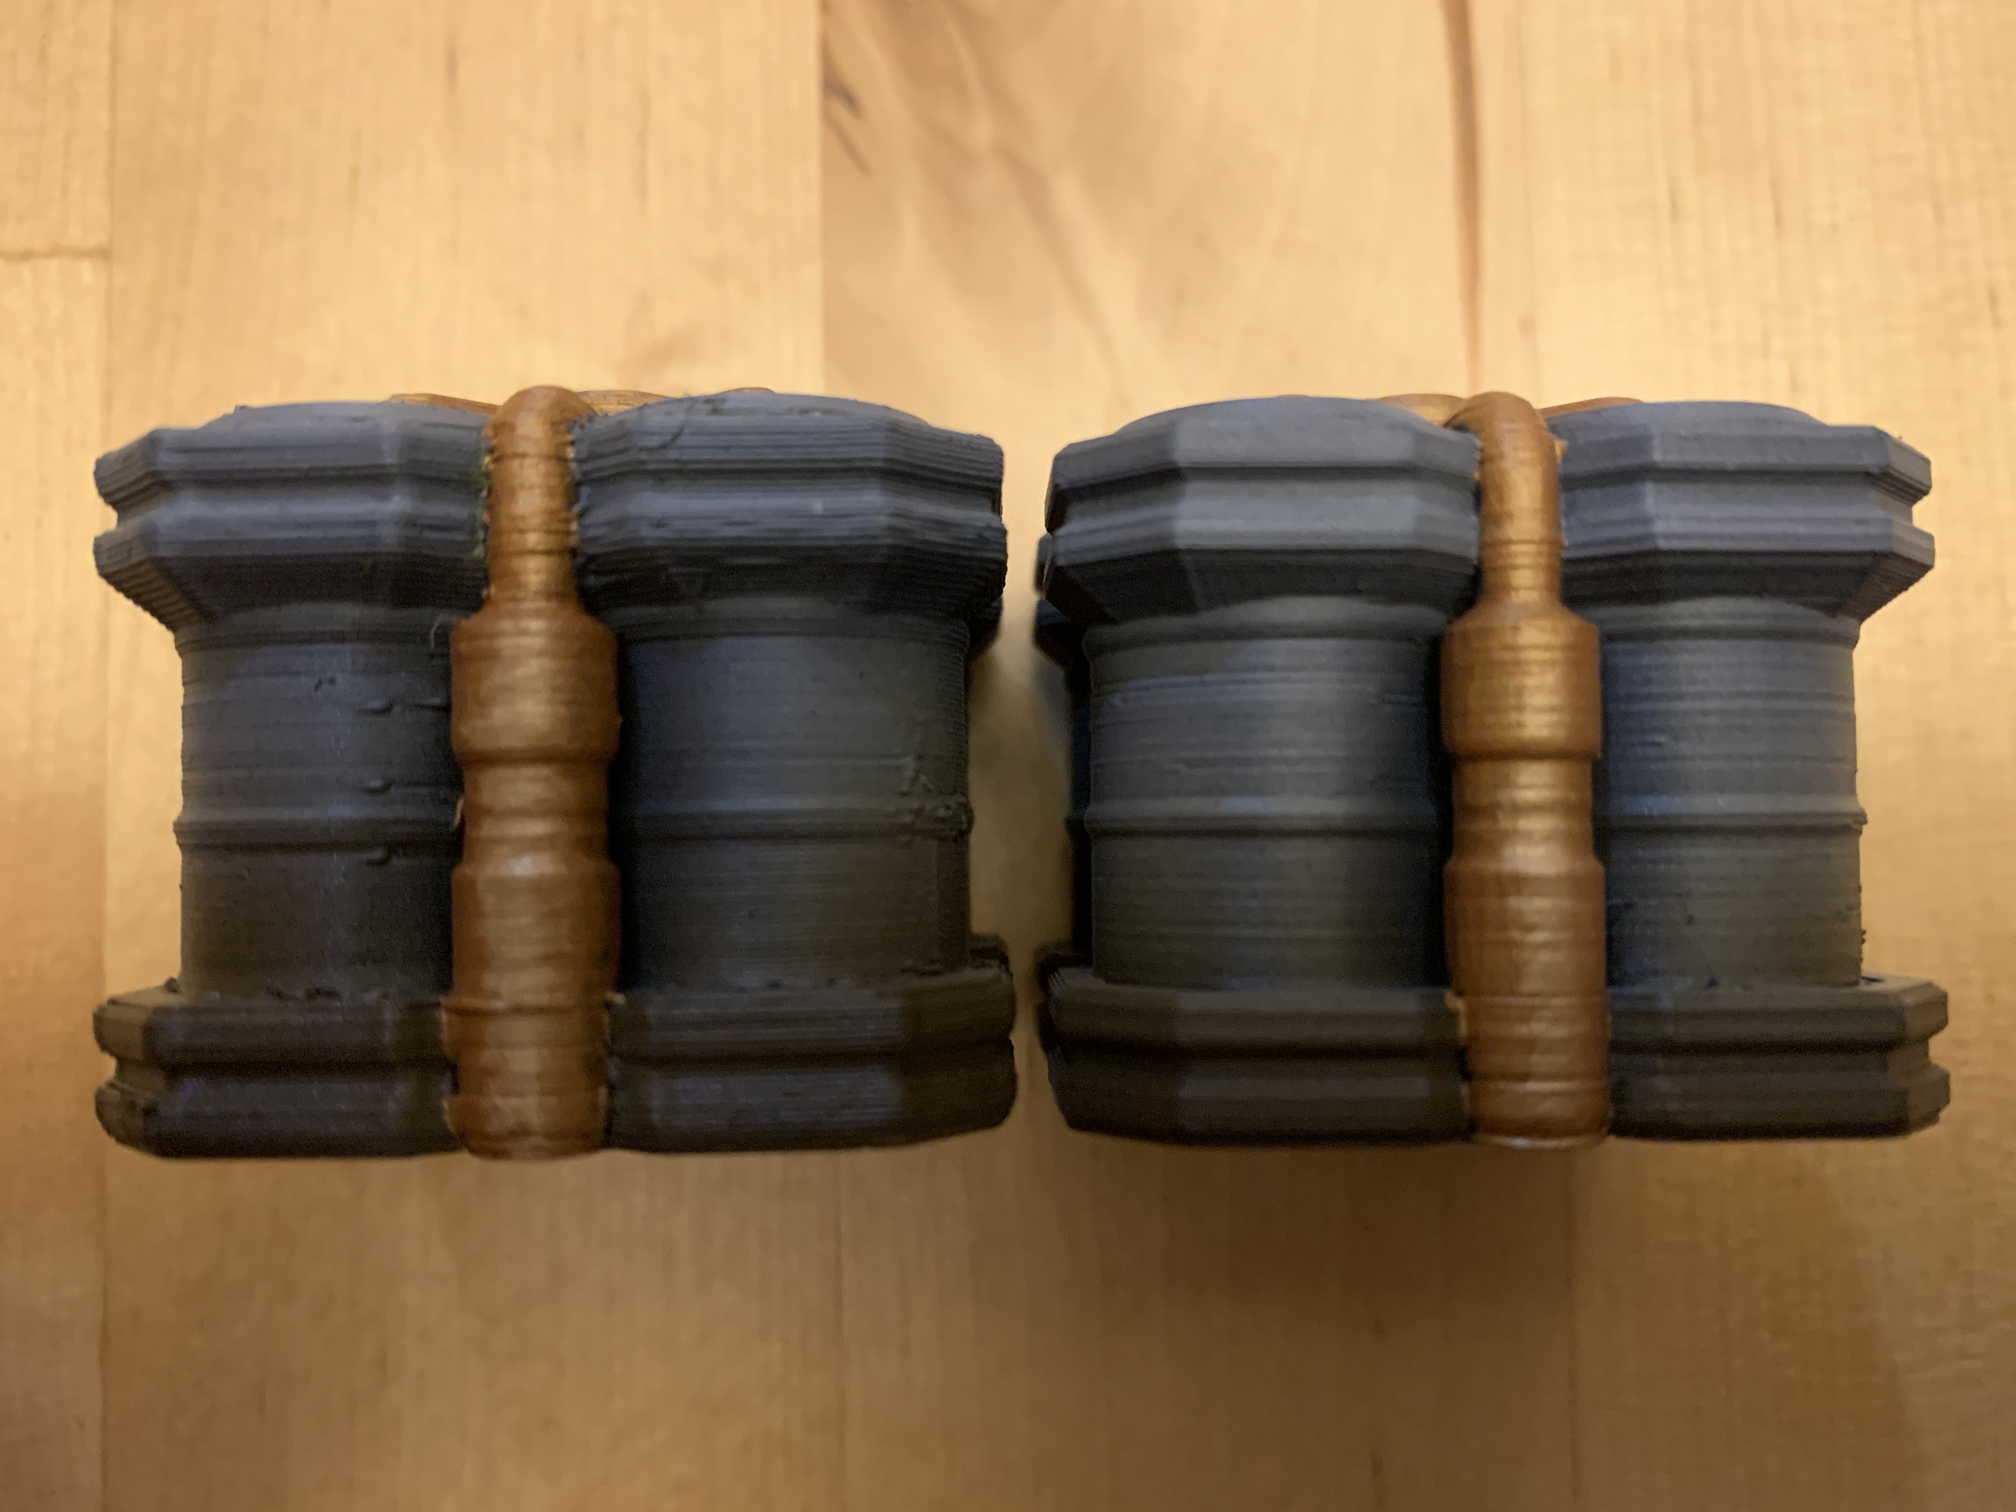
First, we need a test model. I picked a bit from the recent Warlayer Kickstarter that is intended, if I recall correctly, as a bit of scatter terrain on a landing pad.

I picked this for a couple reasons. First, I needed to print five copies of the model, so I wanted something small enough that that wouldn’t take a ton of time. It’s got detail on both the top and the side, which play to different qualities of 3D printing, and it’s got some detail – a little fan at the top, some smooth curved barrels, a pipe, etc. It’s also a model where, if by some miracle, I ended up with 10 perfect copies of this model, it wouldn’t be a disaster.
The model was printed on a Lulzbot Taz Workhorse with a 0.5mm nozzle, at 0.25 and 0.15 mm layer heights. Those straddle the usual 0.2mm layer height a lot of people use for terrain, which should give a picture of how primer performs both with a pretty crude layer height, and a reasonably detailed one. I’ve got a more detailed nozzle available, but the perennial struggle with terrain is balancing detail and time. These settings are a good balance. The models were printed in yellow Hatchbox PLA. Again, this is for a couple reasons – it’s a 3.00mm filament that works really well with my printer, I already had a spool of it, and yellow would show coverage failures really, really obviously.

After printing, the models underwent a very minimal amount of post-processing. A little bit of sanding and a brief hit with a heat gun to kill any lingering stringing, but that’s it. I wanted not to minimize printing flaws to see how primers handle them.
The Primers
Based on some advice and following social media, I decided to try four different primers:
- Duplicolor Filler Primer Grey: A lot of people suggest an automotive filler primer as a good way to hide small layer lines, allow sanding, etc. This stuff was what I could find locally. I would have preferred black, but it’s just not something people seemed to carry.
- Badger Stynlrez Black: This is my go-to airbrush primer for most models.
- Krylon Colormaxx Black: Before I had an airbrush, this was my favorite primer. It’s reliable for me, relatively widely available, and a good generic black spray primer.
- Badger 3D Prime: The new kid on the block, a two-part base and primer system meant for airbrushing from the good people at Badger, designed specifically for 3D prints. This too came in black.
The Paint Job
To put everyone on an equal footing, all models got another quick spray of Minitaire Raven Black, my favorite airbrushable black. From there, some light airbrushed spot highlights were done with Liquitex white ink, followed by a base coat of Minitaire Concrete Grey, which is my go-to generic institutional grey that was part of my massive Zone Mortalis project. After that, some shadows were sprayed in with Daler-Rowney Payne’s Grey, and some lower sprayed brown junk with Burnt Umber ink. Basically, my quick and dirty terrain painting that doesn’t rely on drybrushing or washes, which I’m wary of when talking about the ability for liquids to flow through layer boundaries via capillary action.
The pipes got hit with Scale 75 Victorian Brass, with a light drybrush of Amber Alchemy to make it pop a bit. I used a pretty poor craft store size 2 brush, because I don’t use nice brushes on terrain. Everyone also got a coat of matte varnish at the end, to make sure the paint hues were even, and because what monster doesn’t varnish terrain?
The Rubric
I wanted to evaluate the primers on five aspects:
- Ease of application
- Coverage
- Durability
- Layer Hiding
- Detail
Basically, how easy and how well primer covers, with two 3D print specific questions – do you hide layer lines, and in the process, do you cover up detail?
Lets get into it.
Overall Impressions
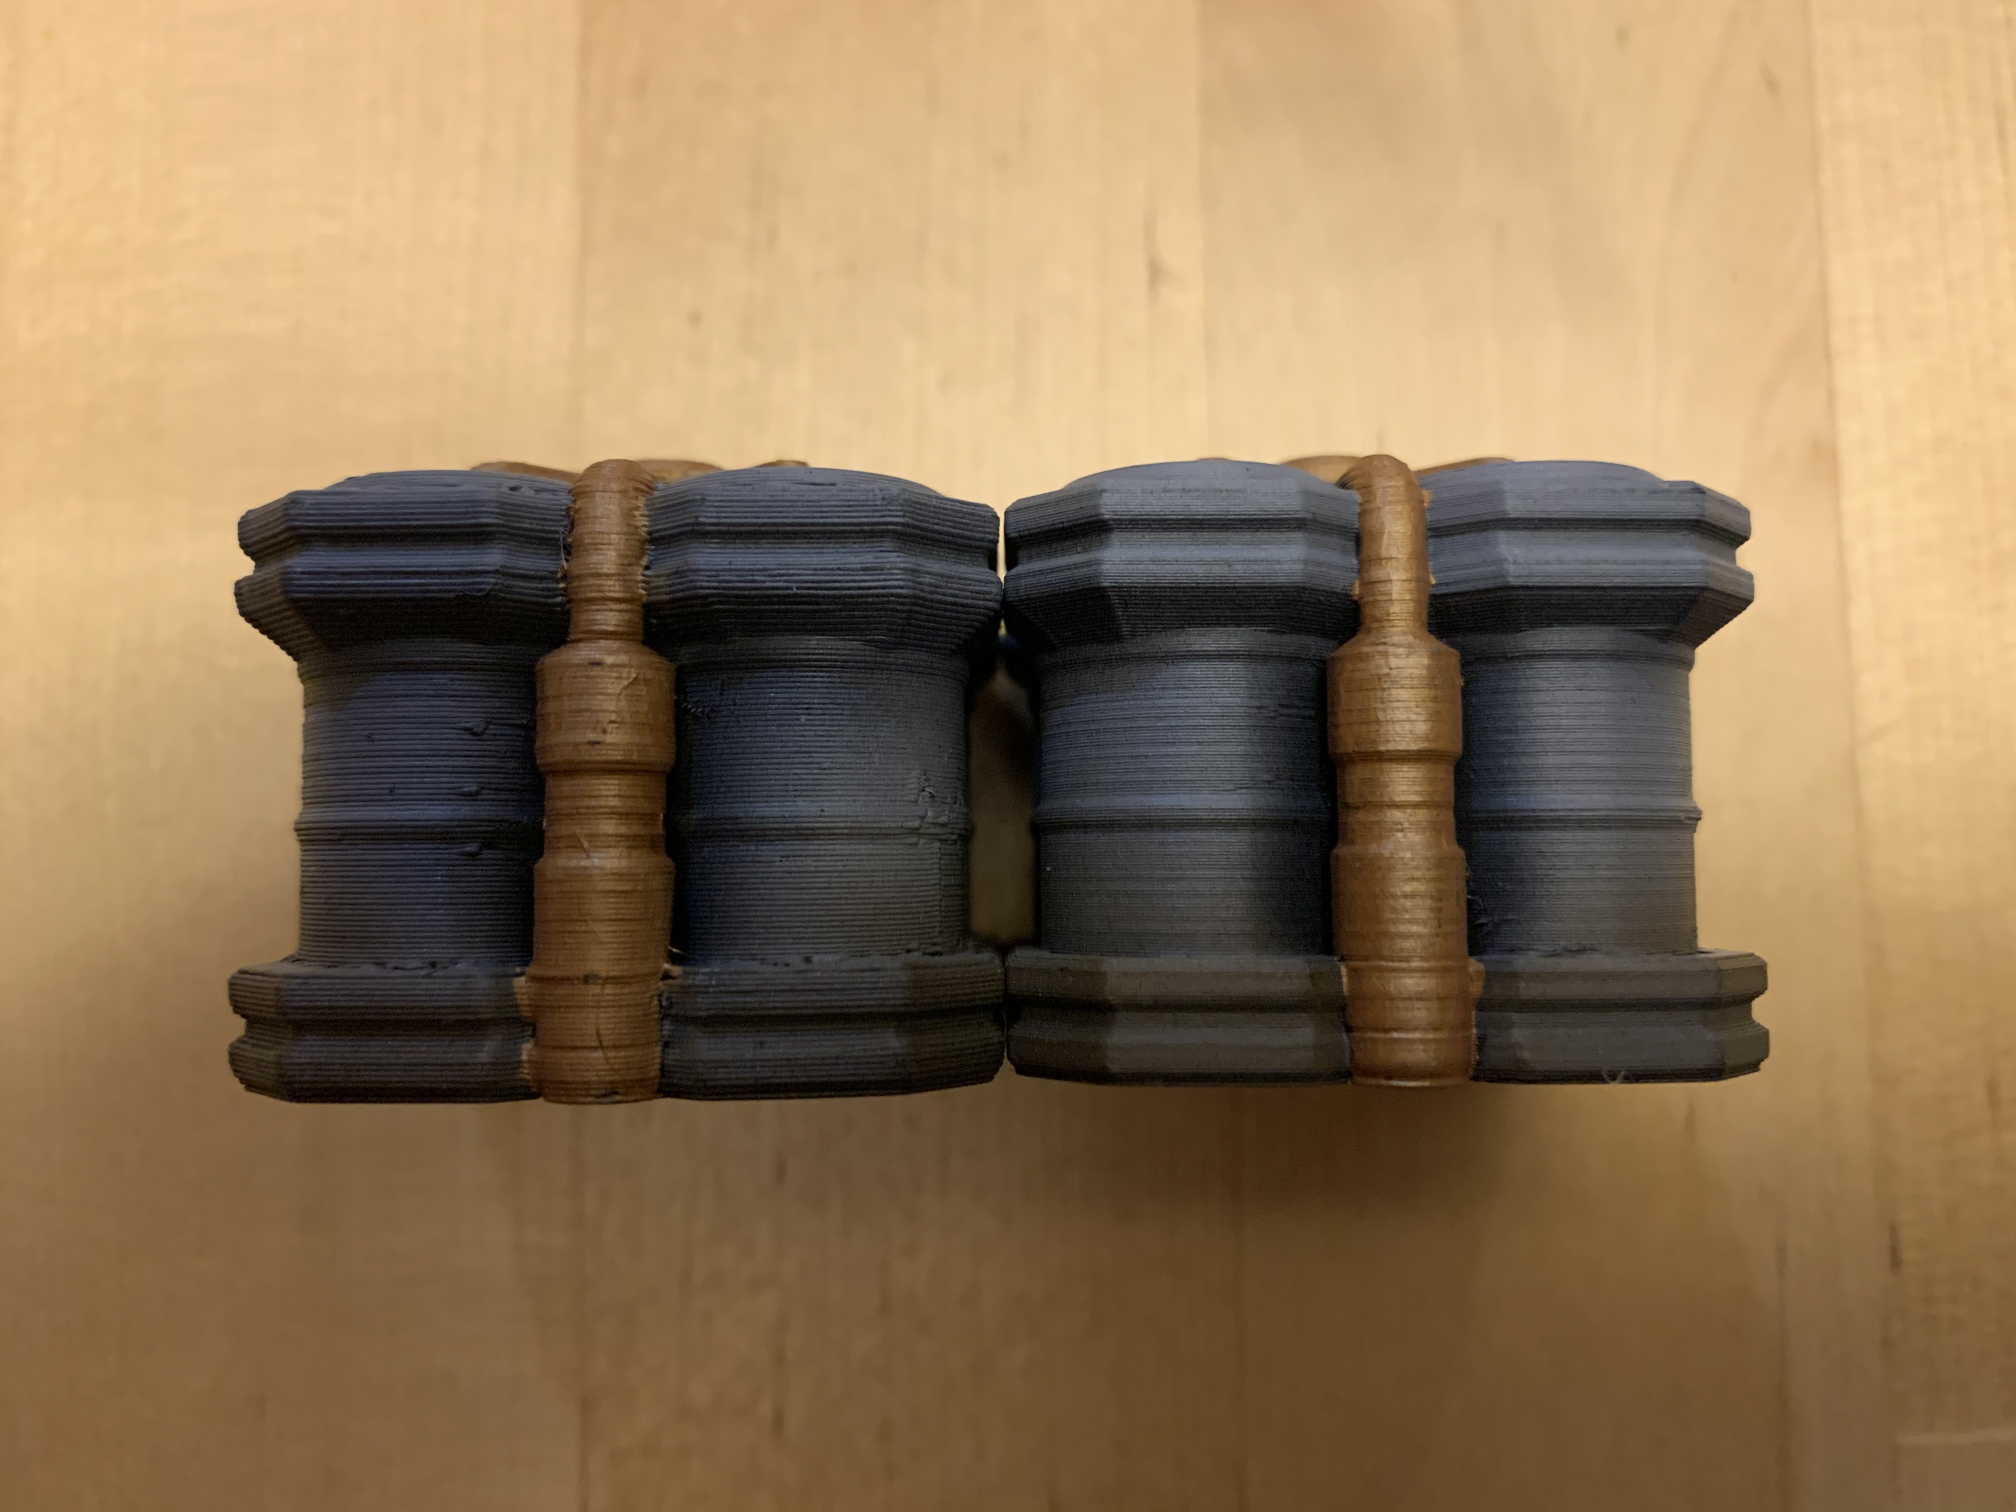
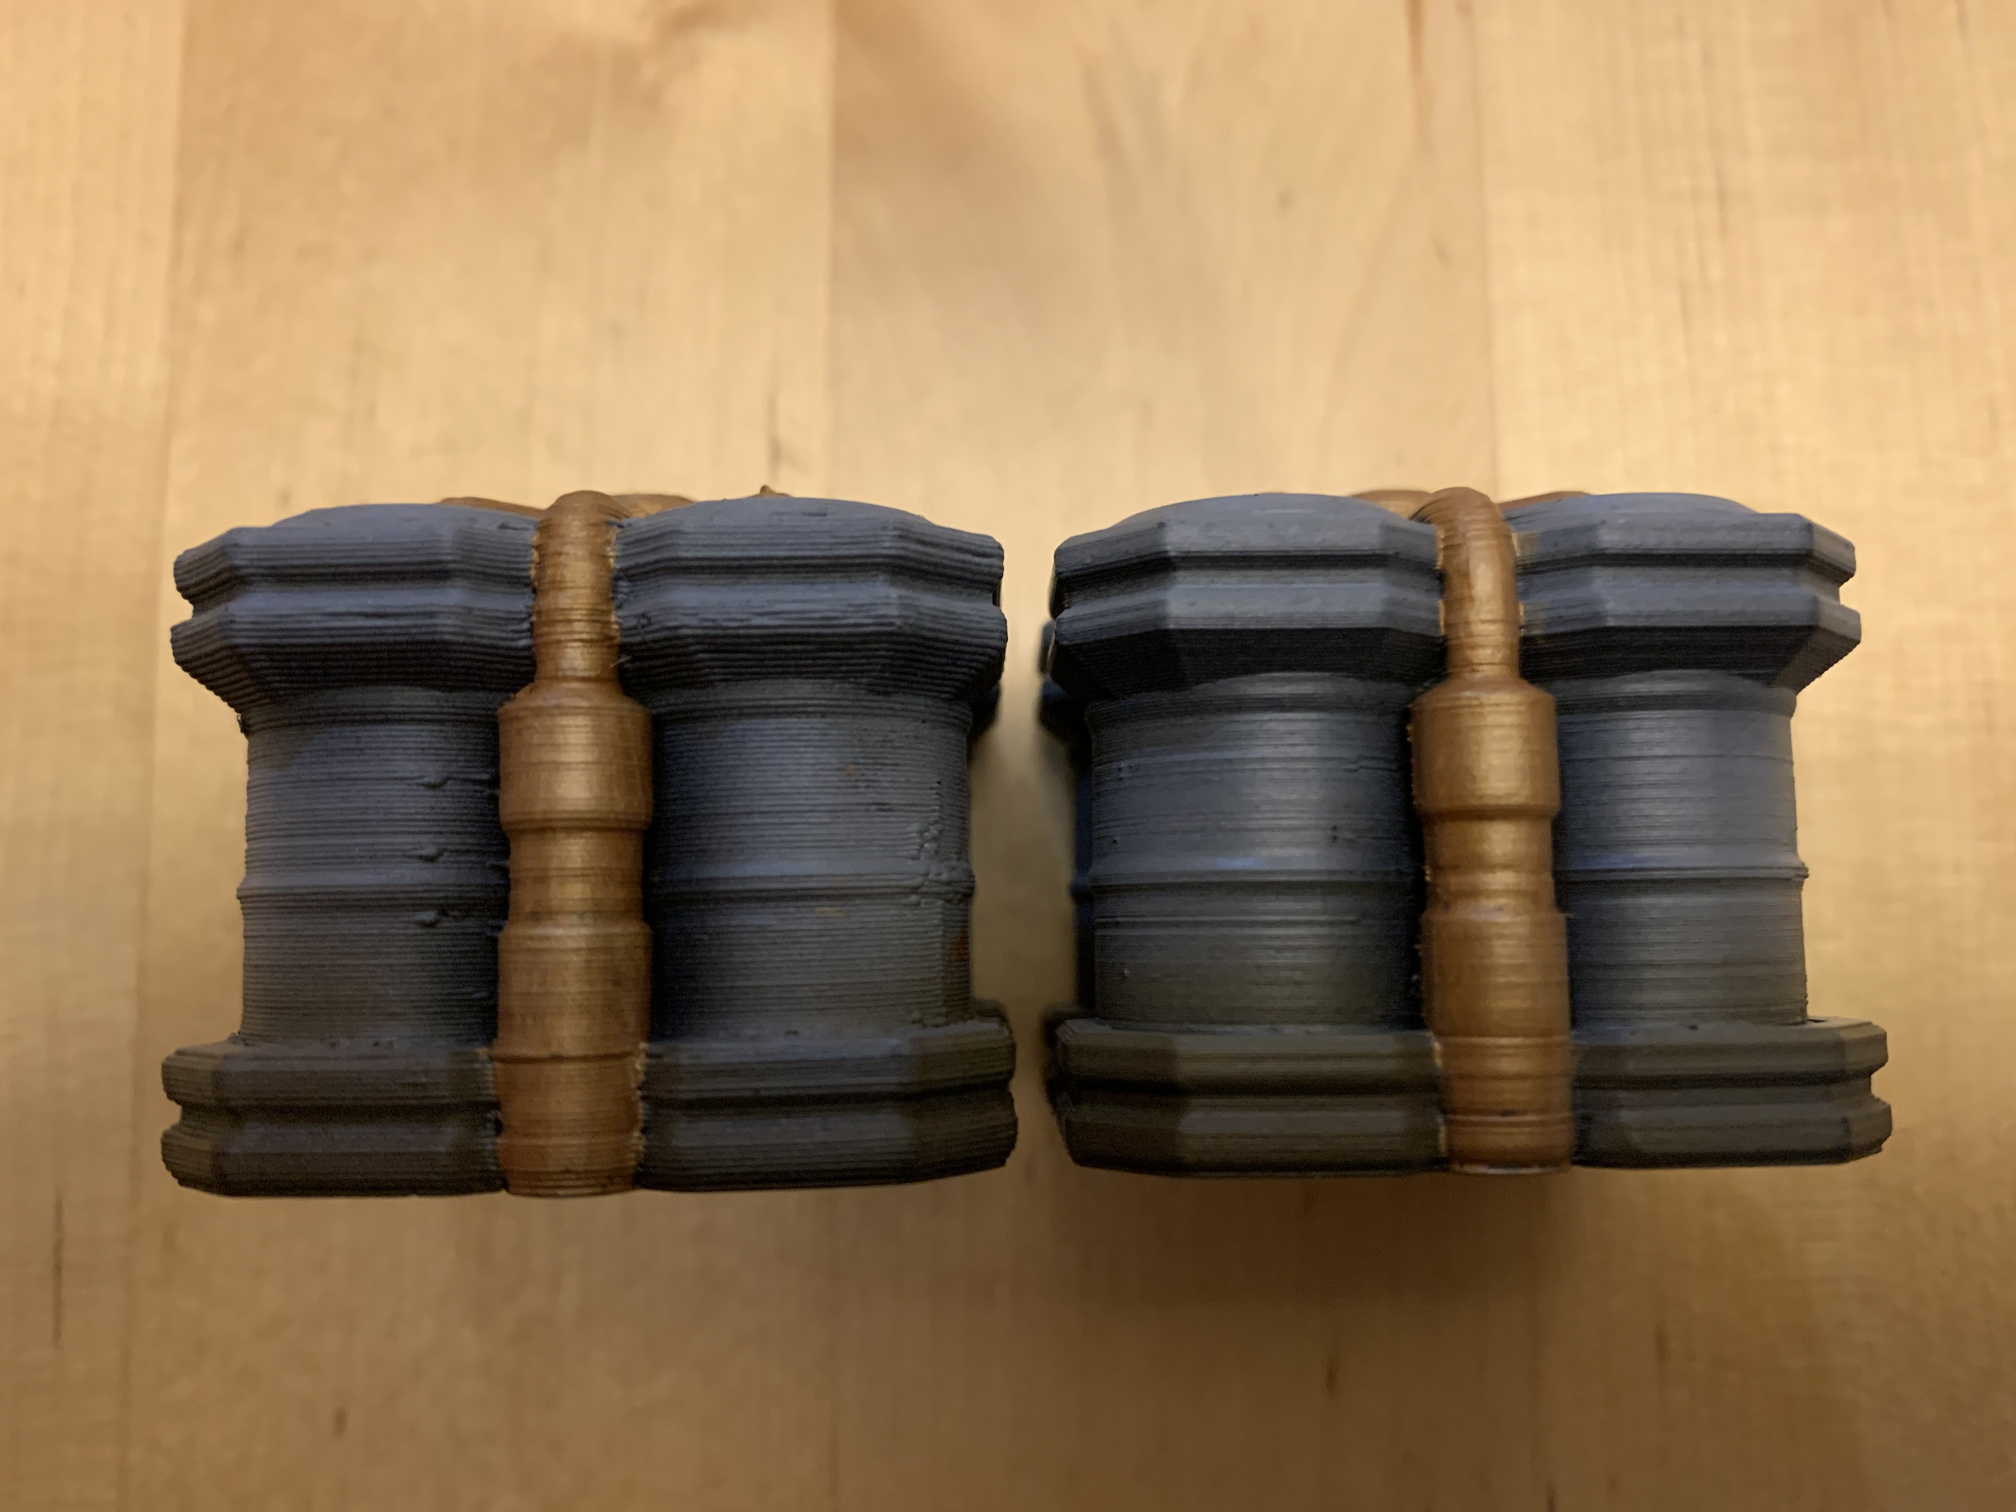
I’m not convinced your primer choice matters much. Below are all eight sample models, in the order of the primers above.
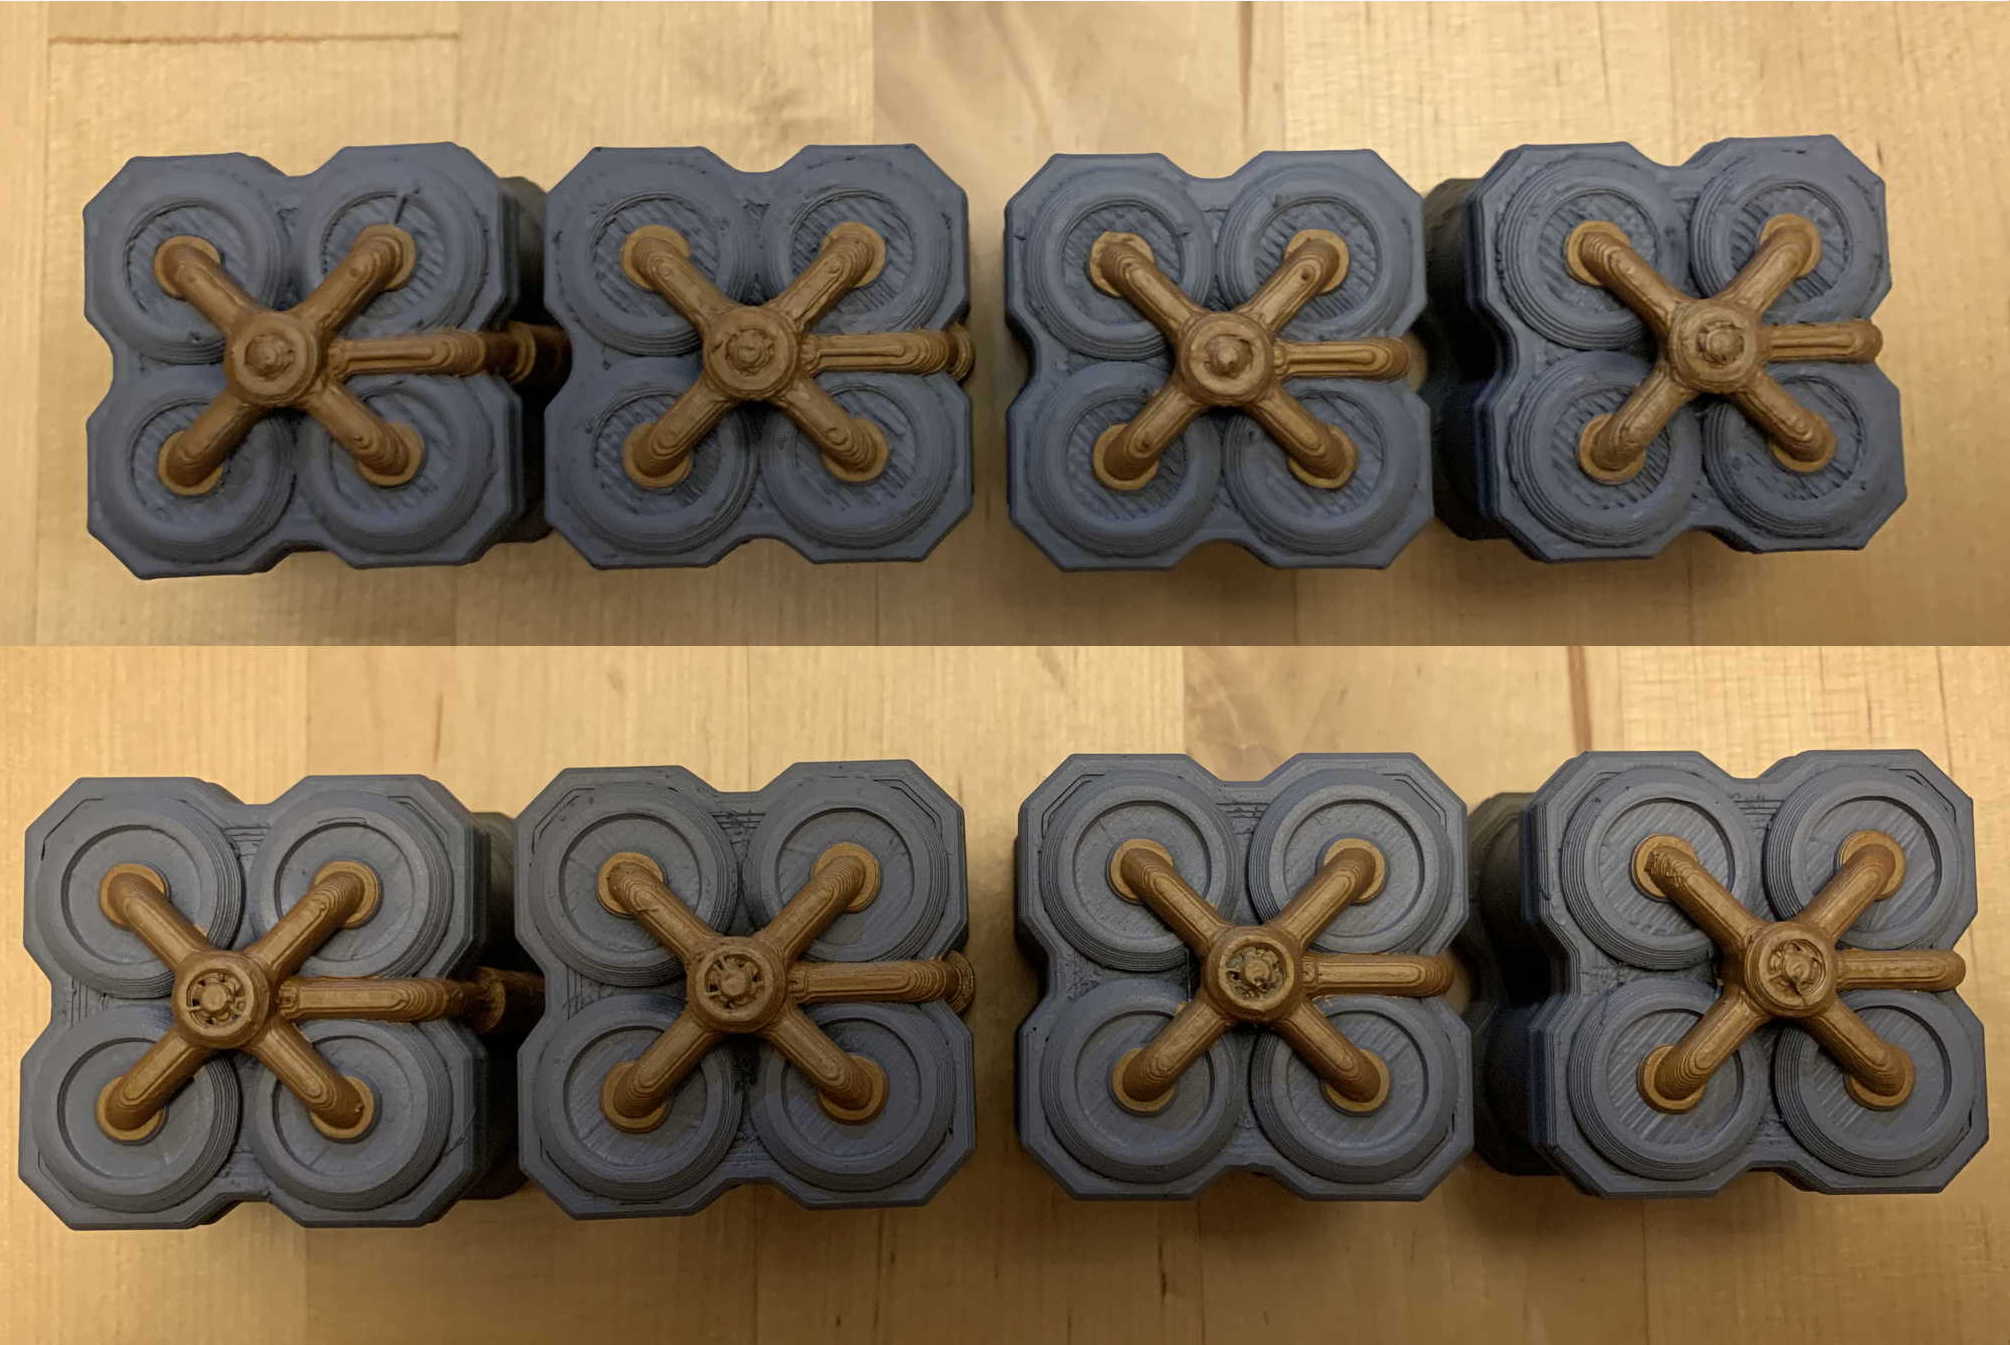
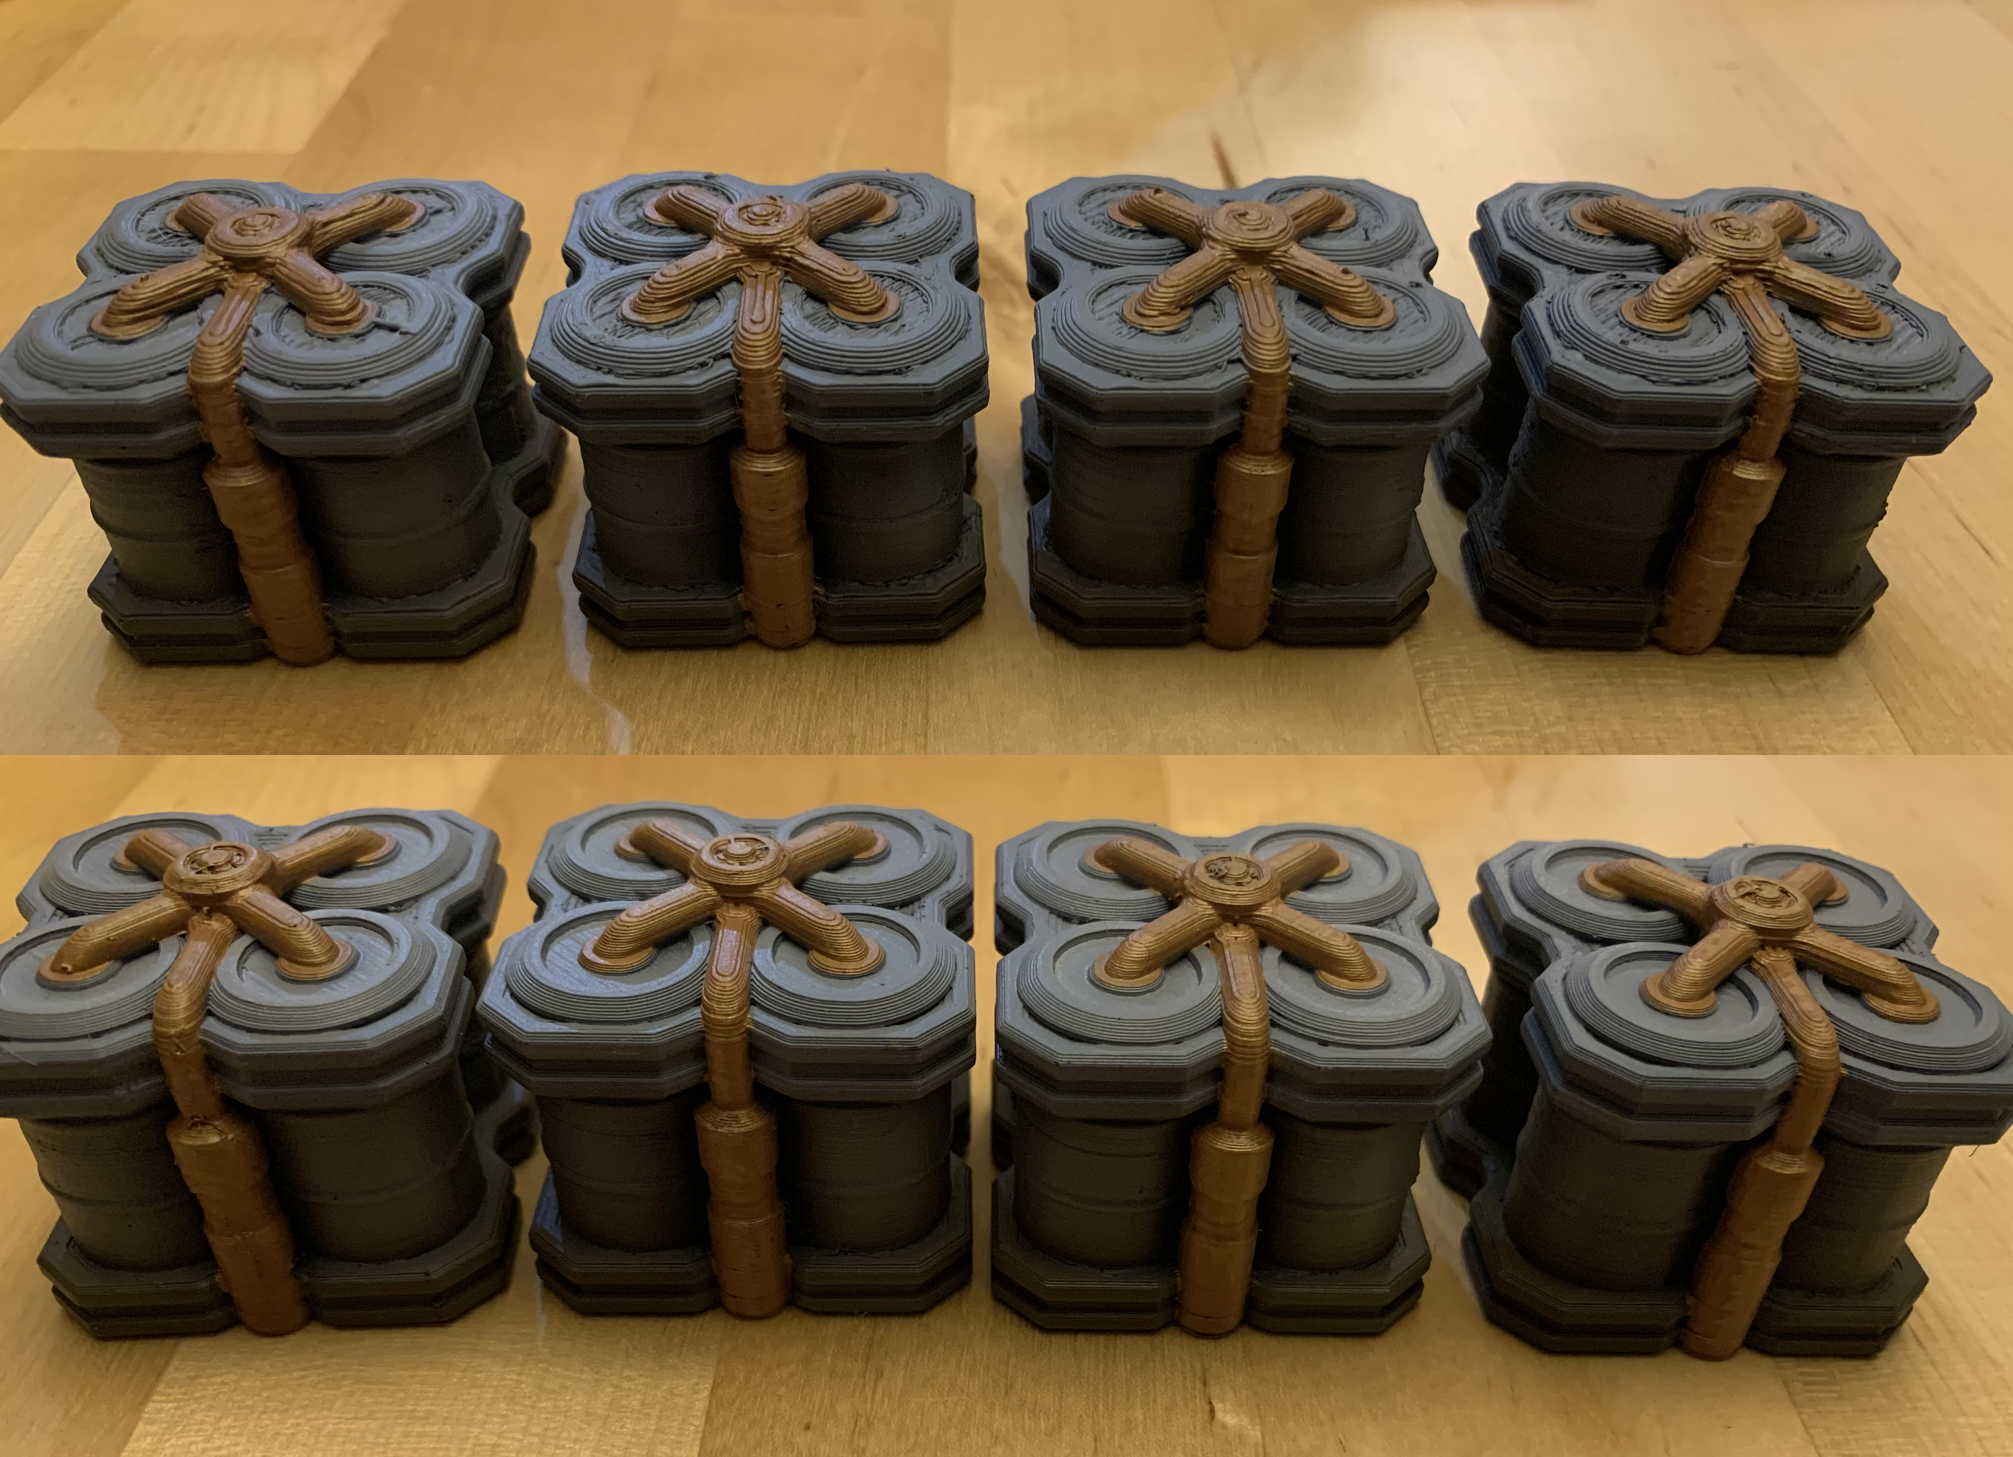
From tabletop distance, I’m not convinced there’s enough of a distance to justify departing from your chosen primer system. And it’s definitely true that the detail of the model itself carries way, way more weight than your primer choice. There’s no amount of filler material, etc. that will let you power through a coarser layer height choice.
Duplicolor Filler Primer
I will be the first to acknowledge that I’m not using sandable filler primer to it’s full effect. There’s a process of filling and then sanding to create ideal smoothness that one can engage in. And on a single model with fairly simple geometry, I fully support doing that. But for miniatures terrain, with both complex topology and a lot of models, I’m not convinced anyone has the time for that.
So instead, we’re considering this as just a one-and-done spray.

Ease of Application: B-. In the summer, B+. The issue with filler primer, like all other spray primers, is that they are a little fussy, and as the temperature drops, it becomes harder and harder to prime. My garage is crowded enough that I don’t want to do it there, and the best ventilated room in the house still results in everything smelling faintly of aerosol. And that is, to use the scientific term, hella toxic.
Coverage: C. This surprised me, because both aerosol primers had large amounts of yellow, uncovered PLA when I was done priming them in my usual fashion. That might not have mattered for paint quality, but it’s definitely a thing. And with the aerosols, it’s hard to get into little nooks to fix that, and for the filler, it also felt like a race between coverage and obscuring detail.
Durability: A. No noticeable problems when handling, painting, etc., including some attempts to rub off the primer on an exposed pipe.
Layer Hiding: B+. On some smooth surfaces, the layer lines on the more detailed model almost disappear, and it knocks down the impact for the faster printing model better, I think, than most of the other primers.
Detail: B+. I was worried that the filler primer would just obliterate detail, but it didn’t. Especially the little fan on the top of the model. The filler primer does get marks down for the inability to do any touch ups etc. without risking a full blast of primer that will likely obscure some detail.
Badger Stynlrez
My favorite, and default primer these days. Also my favorite black for painting base rims. Really, it’s just good stuff. But how does it work for 3D prints?
Ease of Application: A. If you have an airbrush. If not, really this sort of isn’t even worth discussing. Stynlrez goes on like a dream. I don’t bother thinning, and it works reasonably well with every airbrush I use. It’s just good.
Coverage: A. Mostly for the ability to go back and do spot priming in areas, as well as being able to hold a model, tilt it, etc. in a way you really can’t with a rattlecan primer.
Durability: A. Not noticeable damage from handling, painting, concerted rubbing on the pipe to try to get primer to rub off, etc.
Layer Hiding: B-. It didn’t make things worse, but as far as I can tell, there’s really no layer hiding effect beyond just “It’s painted” obscuring some of the layers. Holding it up next to the filler primer model and really looking shows that it performs worse, though again, I think that’s at a layer of examination and detail that I doubt most terrain is going to be subjected to. And if you are subjecting terrain to that level of detail (say, for a competition-level diorama piece) we need to talk about resin printers, or at the very least specialist high detail nozzles that are not the type you find on the average hobbyist Prusa or Ender 3.
Detail: A. Preserving detail is airbrush primer’s wheelhouse, and Stynlrez performs exactly as expected here. The good news about not obscuring layers is that it also doesn’t do anything to details.
Krylon Colormaxx
My old standby, which I still have many, many cans of for MDF terrain priming, the odd household project that needs a primer, etc. Easily available at my local craft store, it’s the spray primer I recommend for people who don’t have an airbrush.
Ease of Application: B. In the summer, A-. I still prefer airbrush primers to rattlecan primers, but I’ve found the Krylon primer to be better behaved than most. It was slightly less nerve wracking to apply as compared to the filler primer, and I had less of a feeling of “any minute now I’m going to utterly flood the model”. That being said, in the winter months, you’re still facing either a priming drought or playing games with running in and out of the house, deciding just how many brain cells you can afford to kill, etc.
Coverage: C. Again, a surprise here, as I’ve often found that the wider, more aggressive spray fans of rattlecans give really good coverage. But again, there was a lot of yellow showing in what would be the shadow of the model, and in contrast to the airbrush primers, it’s hard to go in and do some fine manipulations to address that.
Durability: B. This model had a single incidental scuff on one of the edges. Don’t know how it picked it up, and it didn’t seem to be a systematic failure, as the model held up to my attempts to make the primer rub off, but it’s literally the only primer that took any damage.
Layer Hiding: B. Definitely better than the Stynlrez, but worse than the filler primer. I suspect just the thickness of the paint itself did some work obscuring the layer lines in the detailed model, though not enough to hold up to close inspection.
Detail: B+. As with the filler primer, there’s some concern with primer just obliterating detail when you’re using a rattlecan, which calls for a light touch, but things worked out fine. It just takes a little more care.
Badger 3D Prime
I ordered this when it first came out, but it’s been delayed a bit because I screwed up the order. Oops. But I have a set now, and I figured it’s a worthy potential contender: in theory, all the plusses of the filler primer and Stynlrez combined.
Ease of Application: A. C if you’re in a hurry. 3D Prime is a two step process – first, you put on a transparent layer that does the filling of layer lines, you wait a few hours (I waited overnight), and then you put on the primer itself. It’s not at all clear if said primer could be substituted with say…Stynlrez…which may be the topic of a future test. This works well if you’ve got time to let things dry – and recently, having had a bad experience with not letting some enamels dry enough before moving on, that basically means to me “wait overnight”. If you do that, it works great. If you’re desperately priming prior to a tournament? Less so.
Coverage: A-. Airbrushing clearly leads to solid coverage – my one complaint is that the filler coat is genuinely fairly transparent, which makes it hard to see where you’ve applied it. There’s some products, like AK’s varnishes, that add a very slight tint (in AK’s case it’s blue) to see where you’ve sprayed. Once the filler coat dries, there’s a very light whitish tone that helps. At the priming stage, everything goes just fine.
Durability: A. Not noticeable damage from handling, painting, concerted rubbing on the pipe to try to get primer to rub off, etc.
Layer Hiding: B-. The big question for 3D Prime. Does the double coat, the specialty formulation, etc. pay off? The answer, for me?
Meh.
Visually, I can’t make out much of a difference as compared to the Stynlrez. I asked my wife to blind choose if either of them were better, and her answer was “This one, but I can’t tell you why, and it’s close.” before handing me the Stynlrez primed one. It’s possible I didn’t use the undercoat right, or that it needed another layer, but visually, it looked like there had been a meaningful surface change from the spray. It just…didn’t seem to matter. I’ll keep tinkering with this, but for the moment, this isn’t the epiphany I was hoping for.
Detail: A. The upside of not doing much to obscure layer lines is that detail is preserved rather nicely.
Overall Impressions
It doesn’t matter. You do you. As far as I can tell, if you’re happy with your priming solution, for the purposes of wargaming terrain, your choice of primer isn’t particularly impactful. If you’ve got an airbrush, my preferred primer is and would remain Stynlrez. I don’t think the juice is worth the squeeze to maintain an entirely separate priming system for 3D prints.
I’m going to continue to experiment with the remaining Badger 3D Prime I’ve got on hand to see if I can eek out some improvements there, but at least as far as this test is concerned, prime away with whatever is on hand.
Enjoy what you read? Enjoyed that it was ad free? Both of those things are courtesy of our generous Patreon supporters. If you’d like more quantitatively driven thoughts on 40K and miniatures wargaming, and a hand in deciding what we cover, please consider joining them.
Permalink
I have read this review, and your follow-up with a thicker layer of 3D Prime but I noticed that (according to a screenshot above) you print 0.25 mm layer heights. I wonder if you would print 0.1 or even 0.08 layer heights and then use the 3D Prime if would make more of a difference?
Permalink
So this is tricky, because smaller layer heights inherently have higher quality to them. It certainly *might* work, though some of the examples I printed were at 0.15mm layer heights and I wasn’t terribly impressed with that either.